
Soft Sourdough Sandwich Bread:The Ultimate Guide to a Fluffy, Tender Loaf
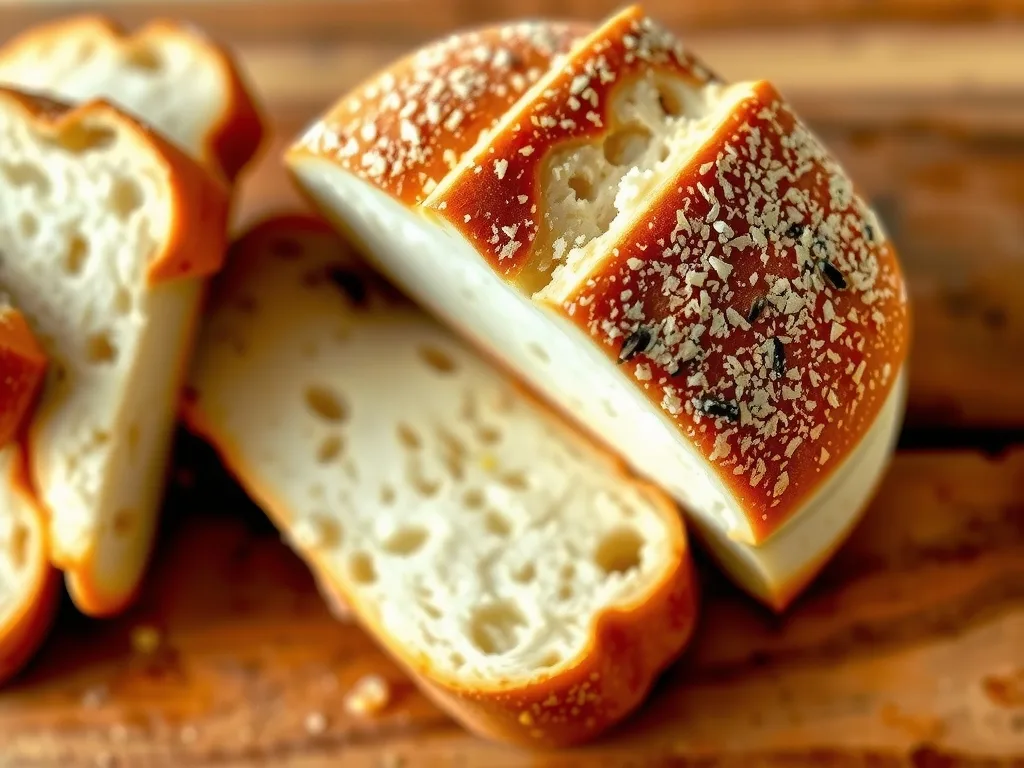
There’s something undeniably comforting about pulling a warm slice of homemade sourdough sandwich bread from the oven, its crust just shy of golden and its crumb pillowy enough to cradle every layer of turkey, cheese, and lettuce you love. For home bakers in the 40‑65+ age range, this recipe bridges the gap between artisan sourdough mastery and the everyday convenience of a soft sandwich loaf. You’ll discover how a modest amount of active starter, a touch of honey, and a gentle fold‑and‑rest method yield a bread that’s tender, slightly sweet, and wonderfully versatile—perfect for school lunches, weekend picnics, or a quiet afternoon toast with avocado.
What sets this loaf apart from typical sourdough boules is its focus on texture rather than toughness. By adjusting hydration, incorporating a bit of oil, and shaping the dough into a tight sandwich‑style loaf, we encourage a fine, uniform crumb that stays soft for days. The method is forgiving: no intensive kneading, no complicated starter maintenance, and plenty of room to swap in discard or adjust flour types. Follow along, and you’ll soon have a reliable go‑to bread that earns compliments at every gathering while still feeling approachable enough for a weekday bake. ## Alternate Names & Variations
Soft sourdough sandwich bread goes by many affectionate names, depending on the region or the baker’s preference. You might see it labeled as sandwich‑style sourdough, soft sourdough loaf, or even sandwich sourdough roll when shaped into smaller portions. Some bakers refer to a version made with discarded starter as sourdough discard sandwich bread, highlighting its eco‑friendly twist. If you love a little extra sweetness, try adding a tablespoon of maple syrup or a pinch of cinnamon for a honey‑sweet sourdough sandwich bread variation. For those who prefer a completely hands‑off approach, the no‑knead sourdough sandwich bread method relies on a longer autolyse and occasional stretch‑and‑folds to develop gluten without any vigorous mixing. Regardless of the name you choose, the core goal remains the same: a tender, slice‑able loaf that holds up to spreads and fillings without tearing.
Ingredients
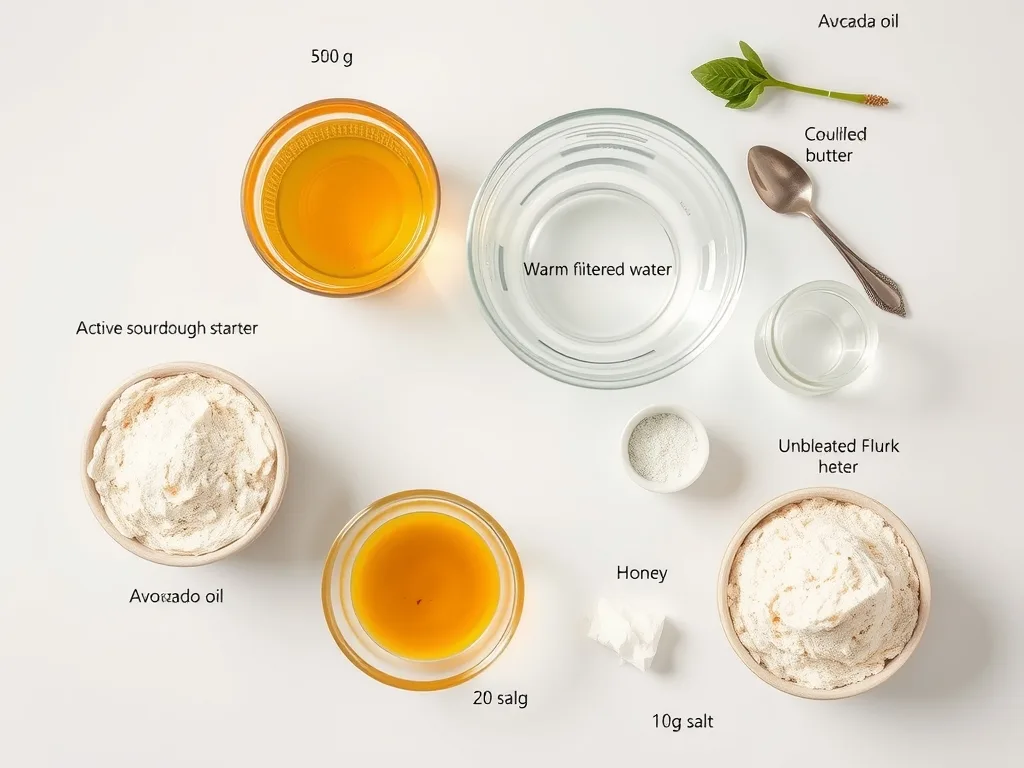
– 150 g active sourdough starter (fed and bubbly, 100% hydration)
– 325 g warm filtered water (around 32‑35 °C / 90‑95 °F)
– 20 g avocado oil (can substitute olive oil or cooled melted butter)
– 25 g honey (or maple syrup for a different note)
– 500 g unbleached flour (bread flour gives extra chew; all‑purpose works beautifully) – 10 g fine sea salt
*Note: The script will place an image immediately after this section.*
Step-by-Step Instructions
1. Mix the autolyse – In a large bowl, combine the warm water, active sourdough starter, honey, and avocado oil. Stir until the starter is mostly dissolved. Add the flour and mix with a spatula until no dry bits remain. Cover the bowl with a damp towel and let rest for 30 minutes. This step hydrates the flour and begins gluten development without kneading.
2. Incorporate salt – Sprinkle the sea salt over the dough. Using wet hands, perform a series of stretch‑and‑folds: grab one side of the dough, stretch it upward, and fold it over the center. Rotate the bowl 90° and repeat. Complete four sets of folds, letting the dough rest 10 minutes between each set. This builds strength while keeping the process gentle.
3. Bulk fermentation – After the final fold, cover the bowl again and let the dough rise at room temperature (about 21‑24 °C / 70‑75 °F) for 3‑4 hours, or until it has increased in volume by roughly 50 % and shows visible bubbles on the surface. If your kitchen is cooler, extend the time; if it’s warm, check earlier to avoid over‑fermentation.
4. Shape the loaf – Lightly flour a work surface and turn the dough out gently. Pat it into a rectangle about 20 cm × 30 cm (8‑inch × 12‑inch). Starting from the short side, roll the dough tightly into a log, pinching the seam to seal. Tuck the ends underneath to create a smooth sandwich‑style shape.
5. Proof in the pan – Grease a 9 × 5‑inch (23 × 13 cm) loaf pan with a bit of oil or line with parchment. Place the shaped dough seam‑side down in the pan. Cover loosely with a towel or a large inverted bowl and let it proof for 1‑2 hours, or until the dough rises just above the rim of the pan and feels springy to the touch.
6. Preheat and bake – While the dough finishes its final proof, preheat the oven to 190 °C (375 °F). Place a shallow pan of water on the lower rack to create steam, which helps develop a soft crust.
7. Bake – Slide the loaf into the oven and bake for 30‑35 minutes, or until the top is deep golden brown and an instant‑read thermometer inserted into the center reads 94‑96 °C (200‑205 °F). If the crust browns too quickly, tent the loaf with foil after the first 20 minutes.
8. Cool – Remove the bread from the oven and let it sit in the pan for 10 minutes, then transfer to a wire rack to cool completely before slicing. This resting period allows the crumb to set, ensuring clean slices.
Chef’s Tips & Substitutions
– For an even softer crumb, replace half of the water with milk or a milk‑alternative.
– If you only have sourdough discard, use 150 g of discard and add an extra 5 g of yeast to boost rise.
– To boost flavor, add 1 teaspoon of malt powder or a tablespoon of yogurt to the autolyse.
Recipe Card Reference
Prep Time: 20 minutes (plus 30‑minute autolyse)
Cook Time: 35 minutes
Total Time: Approximately 4 hours 30 minutes (including bulk fermentation and proof)
Servings: 12 slices (1 ½‑inch thick)
Calories per slice: Roughly 180 kcal (varies with exact flour and oil used)
This breakdown helps you plan your baking day: the active hands‑on time is minimal, while the majority of the period is hands‑off fermentation, perfect for a relaxed weekend morning or an evening after work.
Why This Recipe Works & Expert Tips
The secret to a soft sourdough sandwich bread that stays tender rather than chewy lies in three balanced adjustments. First, the hydration level (approximately 65 % water to flour) is high enough to create an open, moist crumb but not so high that the dough becomes unmanageable for a loaf pan. Second, the inclusion of avocado oil (or butter) coats gluten strands, limiting excessive elasticity and giving the bread a plush mouthfeel. Third, a modest amount of honey provides fermentable sugars that feed the yeast, encouraging a gentle rise and contributing to a softer crust through Maillard browning at lower temperatures.
Using an active sourdough starter ensures a steady production of carbon dioxide and organic acids, which improve flavor and gluten structure without the need for intensive kneading. The series of stretch‑and‑folds during bulk fermentation develops strength gradually, preserving the delicate gas bubbles that yield a light interior. Finally, baking with steam in the oven delays crust formation, allowing the loaf to expand fully before the exterior sets, resulting in that coveted soft, slice‑able surface.
If you encounter a dense loaf, check the starter’s vitality: it should be bubbly and double in size within 4‑6 hours of feeding. An underactive starter will not generate enough gas, leading to a heavy crumb. Over‑proofing can also collapse the gluten network, so watch for the dough to spring back slowly when poked. Adjusting proof times based on ambient temperature will keep your results consistent.
Storage, Freezing, and Reheating
Store the cooled loaf in a bread bag or a clean kitchen towel at room temperature for up to 4 days. For longer freshness, slice the bread and place the slices in a zip‑top freezer bag, separating layers with parchment paper to prevent sticking. Frozen slices retain quality for up to 3 months; simply toast them straight from the freezer or let them thaw on the counter for 15‑20 minutes before using.
To revive day‑old slices, wrap them loosely in foil and warm in a 150 °C (300 °F) oven for 10‑12 minutes, or pop them in a toaster oven until the interior is soft and the exterior regains a light crispness. Avoid microwaving, as it can make the crumb rubbery. If you prefer a softer crust, store the bread in a sealed plastic bag with a slice of apple; the moisture released will keep the crumb supple without making the crust soggy.
People Also Ask ### How do you make sourdough sandwich bread soft and not chewy?

Achieving a soft, non‑chewy crumb hinges on hydration, fat, and gentle gluten development. Keep the dough’s hydration around 65 %—enough water to create moisture but not so much that the gluten over‑develops. Incorporate a tablespoon of oil or melted butter, which lubricates the gluten strands and limits toughness. Use a series of stretch‑and‑folds rather than vigorous kneading to build strength while preserving delicate bubbles. Finally, bake with steam and avoid over‑baking; an internal temperature of 94‑96 °C (200‑205 °F) yields a tender interior without drying out the crumb.
Can you use discard for sourdough sandwich bread?
Absolutely. Sourdough discard works beautifully in this recipe, especially when you add a small boost of commercial yeast to compensate for its lower activity. Use 150 g of discard (about ½ cup) and increase the yeast to 5 g (approximately 1 teaspoon) while keeping the rest of the ingredients the same. The discard contributes flavor and acidity, while the added yeast ensures a reliable rise. Expect a slightly tangier note and a marginally denser crumb, but the loaf will still be soft and sandwich‑ready when you follow the same folding and proofing steps.
Why is my sourdough sandwich bread so dense?
Density usually stems from one of three issues: an underactive starter, insufficient gluten development, or over‑proofing. First, confirm your starter is bubbly and doubles within 4‑6 hours of feeding; if not, feed it more frequently or use a fresher batch. Second, ensure you perform adequate stretch‑and‑folds during bulk fermentation—typically four sets with 10‑minute rests—to create a strong enough gluten network to hold gas. Third, watch the final proof; the dough should rise just above the pan rim and spring back slowly when touched. Over‑proofed dough collapses, yielding a heavy crumb. Adjust proof times based on your kitchen’s temperature, and consider using a slightly higher protein flour (bread flour) for extra structure.
How do you get a soft crust on sourdough sandwich bread?
A soft crust results from delaying crust formation and trapping moisture during the early bake. Introduce steam in the oven by placing a pan of hot water on the lower rack or spraying the oven walls with water right after loading the loaf. This keeps the surface pliable, allowing the loaf to expand fully. Additionally, brush the loaf with melted butter or oil immediately after baking; the fat adds tenderness and a subtle sheen. Finally, avoid baking beyond the ideal internal temperature (94‑96 °C / 200‑205 °F), as excessive drying will harden the crust. If you prefer an even softer exterior, tent the loaf with foil halfway through baking.
Conclusion Baking your own Soft Sourdough Sandwich Bread fills the kitchen with a warm, yeasty aroma that promises a loaf as comforting as it is versatile. With a modest amount of active starter, a touch of honey, and a little oil, you’ll create a tender crumb that holds up to every sandwich creation—from classic turkey and cheddar to bold avocado and sprouts. The method is forgiving, making it ideal for both seasoned sourdough enthusiasts and those looking to incorporate discard into their routine without fuss. Give this recipe a try, slice into the steamy interior, and notice how each bite stays moist and satisfying from the first toast to the last leftover. Share your loaf on social media, tag your favorite sandwich fillings, and invite friends to experience the joy of homemade sourdough that’s truly made for everyday enjoyment. Happy baking!
You Might Also Like
– Easy Sourdough Sandwich Loaf with Honey and Oats
– Fluffy Sourdough Bread Recipe for Beginners
– No Knead Sourdough Sandwich Bread Using Discard
– Sourdough Sandwich Bread with Olive Oil and Herbs
– How to Make Sourdough Rolls Soft and Fluffy
– Tips for Achieving a Perfect Sourdough Crust Every Time