
Table of Contents: Valentine’s Thumbprint Cookies
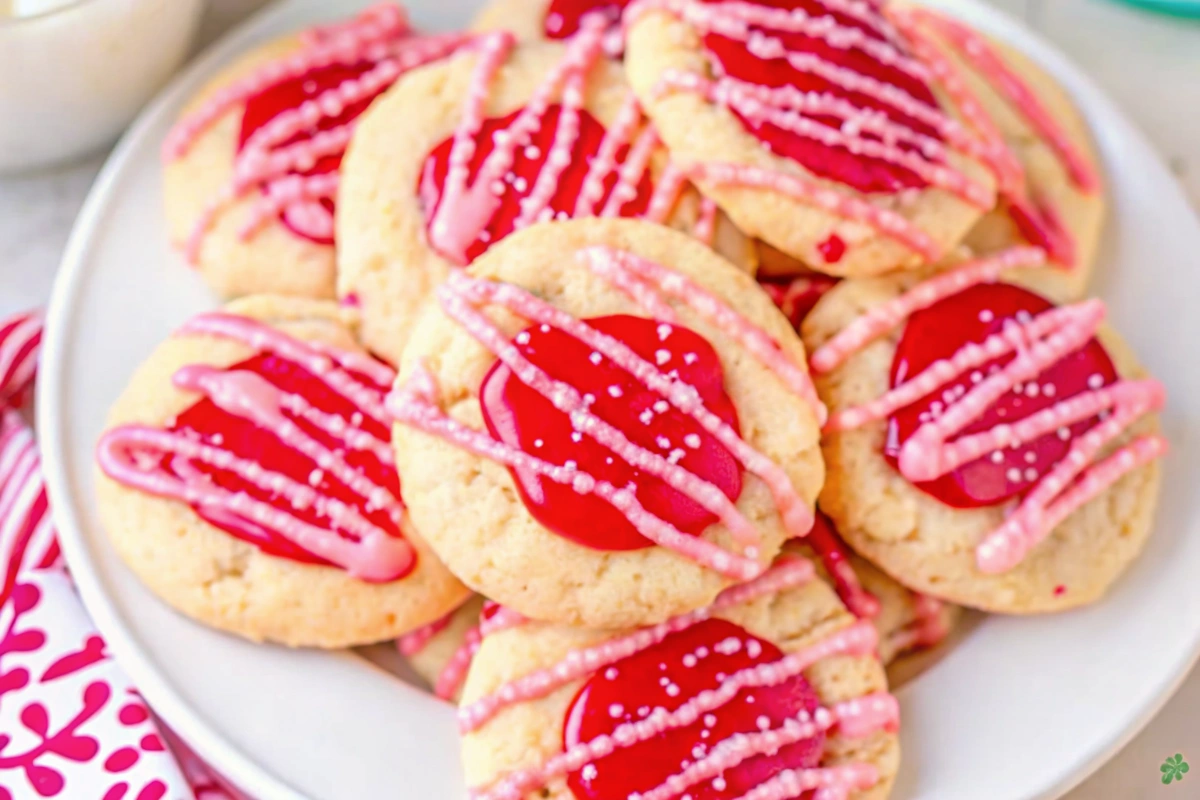
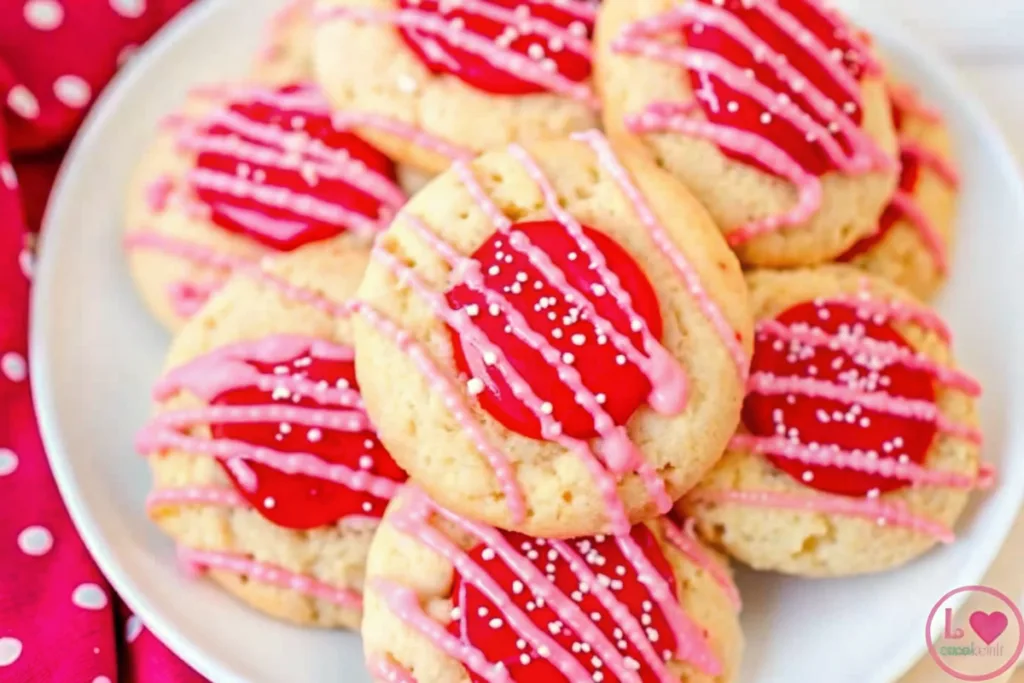
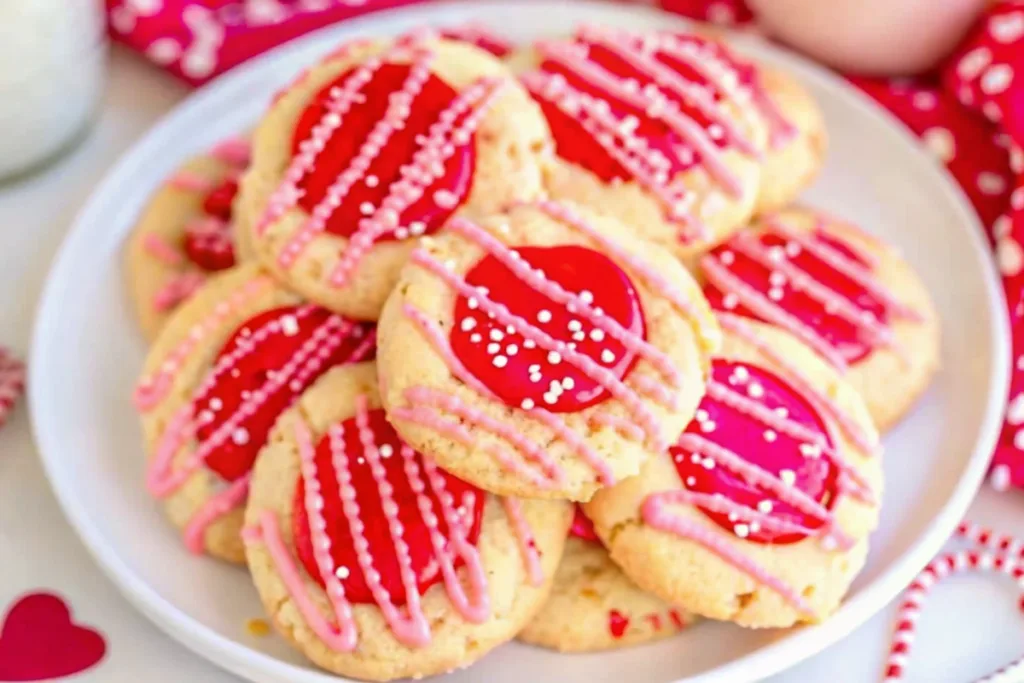
Valentine’s Thumbprint Cookies
Remember the joy of baking with your children or grandchildren? Or the simple pleasure of sharing a homemade treat with a dear friend? These Valentine’s Thumbprint Cookies aren’t just a recipe; they’re a little piece of nostalgia, a way to create new memories, and a delicious expression of love.
Perfect for adding a personal touch to your Valentine’s celebrations, these delightful jam cookies are surprisingly easy to make and guaranteed to bring a smile to anyone who receives (or eats!) them. Let’s bring back the warmth of the kitchen and the sweetness of giving with this classic recipe.
These beautiful cookies are a wonderful way to show you care. Whether you’re preparing for a romantic Valentine’s Day, a fun-filled family gathering, or simply want to brighten someone’s day, Valentine’s Thumbprint Cookies are a delightful choice. They’re a step up from store-bought, yet approachable enough for even beginner bakers.
The vibrant colors and sweet jam filling make them visually appealing and utterly irresistible. This recipe is a fantastic addition to your Valentine’s baking repertoire, offering a charming and delicious treat that’s sure to become a cherished tradition.
This recipe is more than just a dessert; it’s about connection and creating moments. The process of making them – the mixing, the rolling, the gentle pressing of a thumb – is therapeutic and rewarding. And the best part? Sharing the finished product with those you love.
So, dust off your baking sheets, gather your ingredients, and let’s get started on a batch of thumbprint cookies that will fill your home with the aroma of butter, sugar, and sweet, sweet love.
Alternate Names & Variations
These cookies go by many names! You might also find them called Spritzgebäck (especially in German-speaking regions), Butter Thumbprint Cookies, or simply Jam-Filled Cookies. There are countless variations too, from using different types of jam (raspberry, apricot, strawberry are all popular) to adding a dusting of powdered sugar after baking.
Some bakers even dip the entire cookie in chocolate! For a slightly different take, consider adding a hint of almond extract to the dough for a delicate flavor.
Ingredients: Valentine’s Thumbprint Cookies
COOKIE DOUGH:
- ¾ cups (1 ½ sticks) unsalted butter, softened – Ensure it’s truly softened, but not melted, for the best texture.*
- ½ cup granulated sugar – Provides sweetness and helps with browning.*
- 1 large egg – Binds the ingredients together and adds richness.*
- 1 teaspoon vanilla extract – Enhances the flavor of the cookies.*
- 1 ¾ cups all-purpose flour – The base of our cookie dough.*
- ½ teaspoon baking powder – Helps the cookies hold their shape and have a tender crumb.*
- 1 teaspoon Valentine sprinkles – Adds a festive touch to the dough itself.*
CHOCOLATE FILLING:
- 6 ounces red candy melts – For a vibrant Valentine’s Day color.*
- 6 ounces pink candy melts – Complements the red and adds visual appeal.*
- Valentine sprinkles for garnish – A final flourish of sweetness and festivity.*
Step-by-Step Instructions
1. Cream Butter and Sugar: In a large bowl, cream together the softened butter and granulated sugar until light and fluffy. This usually takes about 3-5 minutes with an electric mixer. Chef’s Tip: Don’t rush this step! Properly creamed butter and sugar create a tender cookie.
2. Add Egg and Vanilla: Beat in the egg until well combined, then stir in the vanilla extract.
3. Combine Dry Ingredients: In a separate bowl, whisk together the flour and baking powder.
4. Gradually Add Dry Ingredients to Wet Ingredients: Slowly add the dry ingredients to the wet ingredients, mixing until just combined. Be careful not to overmix, as this can result in tough cookies. Gently fold in the Valentine sprinkles.
5. Chill the Dough: Wrap the dough in plastic wrap and chill in the refrigerator for at least 30 minutes. This makes the dough easier to handle and prevents the cookies from spreading too much during baking.
6. Preheat Oven & Prepare Baking Sheet: Preheat your oven to 350°F (175°C). Line a baking sheet with parchment paper.
7. Roll and Shape Cookies: Roll the chilled dough into small balls, about ¾ inch in diameter. Place them on the prepared baking sheet, leaving about 1 inch between each cookie.
8. Create the Thumbprint: Using your thumb (or the back of a small spoon), gently press a dent into the center of each cookie. Chef’s Tip: Dip your thumb in a little flour to prevent sticking.
9. Melt the Candy Melts: Melt the red and pink candy melts separately according to package directions. You can use a microwave or a double boiler.
10. Fill the Thumbprints: Carefully spoon a small amount of melted red candy melt into some of the thumbprints, and pink candy melt into the others. Don’t overfill!
11. Garnish: Immediately sprinkle the wet candy melt with Valentine sprinkles.
12. Bake: Bake for 8-10 minutes, or until the edges of the cookies are lightly golden brown.
13. Cool: Let the cookies cool on the baking sheet for a few minutes before transferring them to a wire rack to cool completely.
Recipe Card Block (Quick Reference)
These Valentine’s Thumbprint Cookies take approximately 45 minutes to make from start to finish. The prep time is around 20 minutes, the baking time is 8-10 minutes, and the cooling time is about 15 minutes. This recipe yields approximately 24 cookies.
Each cookie contains approximately 80-100 calories, depending on the amount of candy melt filling.
Why This Recipe Works & Expert Tips
This recipe works because of the balance of ingredients. The high butter content creates a tender, melt-in-your-mouth texture, while the baking powder provides just enough lift to keep the cookies from being too dense.
Chilling the dough is crucial – it prevents spreading and ensures the thumbprints hold their shape. Using candy melts instead of traditional jam offers a unique, vibrant look and a delightful chocolatey flavor.
For those seeking easy comfort food for family dinners or a special treat to share, these cookies are a perfect fit. They’re a delightful way to end a meal or simply enjoy a cozy afternoon together. Don’t be afraid to get creative with the sprinkles! Mix and match colors and shapes to personalize your Valentine’s baking.
Storage, Freezing, and Reheating Tips
Storage: Store cooled thumbprint cookies in an airtight container at room temperature for up to 3 days.
Freezing: Unbaked cookie dough can be frozen for up to 2 months. Wrap tightly in plastic wrap and then place in a freezer-safe bag. Thaw in the refrigerator overnight before rolling and baking. Baked cookies can also be frozen, but the texture may change slightly. Freeze in a single layer on a baking sheet, then transfer to a freezer-safe container.
Reheating: These cookies are best enjoyed at room temperature. If you’ve frozen them, you can gently warm them in the oven for a few minutes to restore some of their softness.
People Also Ask: Valentine’s Thumbprint Cookies
How do you make Valentine’s thumbprint cookies?
These Valentine’s Thumbprint Cookies are made by creaming together butter and sugar, adding an egg and vanilla, then gradually incorporating flour and baking powder. The dough is chilled, rolled into balls, and a thumbprint is pressed into each one. Finally, the thumbprints are filled with melted candy melts and decorated with Valentine’s sprinkles before baking. It’s a relatively simple process, perfect for bakers of all skill levels. The key is to not overmix the dough and to chill it properly for the best results.
H3: What kind of jam is best for thumbprint cookies?
While this recipe uses candy melts, traditionally thumbprint cookies are filled with jam! Raspberry jam is a classic choice, offering a beautiful color and tart-sweet flavor. Apricot jam is another popular option, providing a smooth and slightly floral taste.
Strawberry, cherry, and even orange marmalade can also be used. The best jam is one that you enjoy and that has a relatively thick consistency to prevent it from running.
How do you prevent the jam from overflowing?
To prevent the jam from overflowing when baking thumbprint cookies, don’t overfill the indentations. A small amount of jam is all you need. Also, ensure the dough is chilled properly, as this helps it hold its shape. Baking at the correct temperature is also important – too low, and the jam will have more time to spread. If you’re using a thinner jam, you can try adding a small amount of cornstarch to thicken it.
Can I use other fillings?
Absolutely! While jam and candy melts are traditional, you can get creative with the fillings for your Valentine’s Thumbprint Cookies. Consider using Nutella, peanut butter, lemon curd, or even a small piece of chocolate. For a more sophisticated flavor, try a ganache made with white or dark chocolate. The possibilities are endless!
Conclusion: Valentine’s Thumbprint Cookies
I hope you enjoy making these Valentine’s Thumbprint Cookies as much as I do! They’re a delightful way to spread a little love and sweetness this Valentine’s Day. Don’t hesitate to experiment with different sprinkles and candy melt colors to create your own unique designs.
If you try this recipe, please let me know in the comments below! I’d love to hear how they turned out and if you made any fun variations. And be sure to share your beautiful creations on social media – tag me so I can see them! Happy baking, and Happy Valentine’s Day!
You Might Also Like:
– What Is in a Purple Rain Cocktail? 5 Best Mixes to Try!
– High-Protein Pumpkin Baked Oatmeal: The Ultimate Fall Breakfast Boost
– Zucchini Pumpkin Muffins – The Best Moist & Healthy Recipe to Bake This Fall
– Garden Fresh Peach Salsa: The Best Easy & Fresh Summer Dip Recipe
Find Us On Pinterest and Facebook.
Print
Valentine’s Thumbprint Cookies
- Total Time: 32
- Yield: 24 cookies 1x
Description
These adorable Valentine’s Thumbprint Cookies feature buttery shortbread filled with vibrant candy melt centers and festive sprinkles. Perfect for spreading love during the holiday season or as edible Valentine’s Day gifts. Each melt-in-your-mouth cookie is as sweet to look at as it is to eat!
Ingredients
Cookie Dough:
- ¾ cup butter (softened)
- ½ cup granulated sugar
- 1 large egg
- 1 teaspoon vanilla extract
- 1 ¾ cups all-purpose flour
- ½ teaspoon baking powder
- 1 teaspoon Valentine sprinkles
Chocolate Filling:
- 6 ounces red candy melts
- 6 ounces pink candy melts
- Valentine sprinkles for garnish
Instructions
- Preheat oven to 350°F (175°C) and line baking sheets with parchment paper.
- In large bowl, cream together softened butter and sugar until light and fluffy.
- Beat in egg and vanilla extract until fully incorporated.
- Whisk together flour and baking powder in separate bowl, then gradually mix into wet ingredients.
- Fold in Valentine sprinkles until evenly distributed through dough.
- Scoop dough by tablespoonfuls and roll into balls. Place 2 inches apart on prepared baking sheets.
- Make thumbprint indentation in center of each cookie ball using your thumb or teaspoon.
- Bake 10-12 minutes until edges barely golden. Cool on baking sheets 5 minutes before transferring to rack.
- Melt candy melts in separate microwave-safe bowls (30-second intervals, stirring between each).
- Fill cooled cookie indentations with alternating pink and red candy melts using piping bag or spoon.
- Immediately decorate with Valentine sprinkles before chocolate sets. Let harden completely before serving.
Notes
Tips: For smoother filling, add 1 teaspoon coconut oil to candy melts. Substitutions: Use strawberry jam or white chocolate if candy melts unavailable. Storage: Keep in airtight container at room temperature up to 1 week, or freeze undecorated cookies for up to 3 months.
- Prep Time: 20
- Cook Time: 12
- Category: B
- Method: Baking
- Cuisine: American
Nutrition
- Serving Size: 1 cookie
- Calories: 130
- Sugar: 10
- Sodium: 50
- Fat: 6
- Saturated Fat: 3.5
- Unsaturated Fat: 2
- Trans Fat: 0
- Carbohydrates: 18
- Fiber: 0.3
- Protein: 1.2
- Cholesterol: 20
Keywords: Valentine’s, Cookies, Candy Melts, Easy Dessert, Holiday Baking